
TRC20, ERC20 or BEP20: how not to lose USDT and what to do if a transfer gets stuck
July 10, 2026
The most common reason crypto gets lost during transfers is choosing the wrong network. The confusion is especially common with USDT. The same stablecoin exists across dozens of different blockchains, and if you send USDT from the Ethereum network to an address in the Tron network, the transaction may fail to arrive or get stuck for a long time.
Let’s break down, without complex terminology, how TRC20, ERC20 and BEP20 differ, how to check transfer details correctly and what to do if a payment gets the Pending status.
What are TRC20, ERC20 and BEP20?
These are technical token standards in different blockchains. For a regular user, the difference between them comes down to three things: speed, fee size and wallet compatibility.
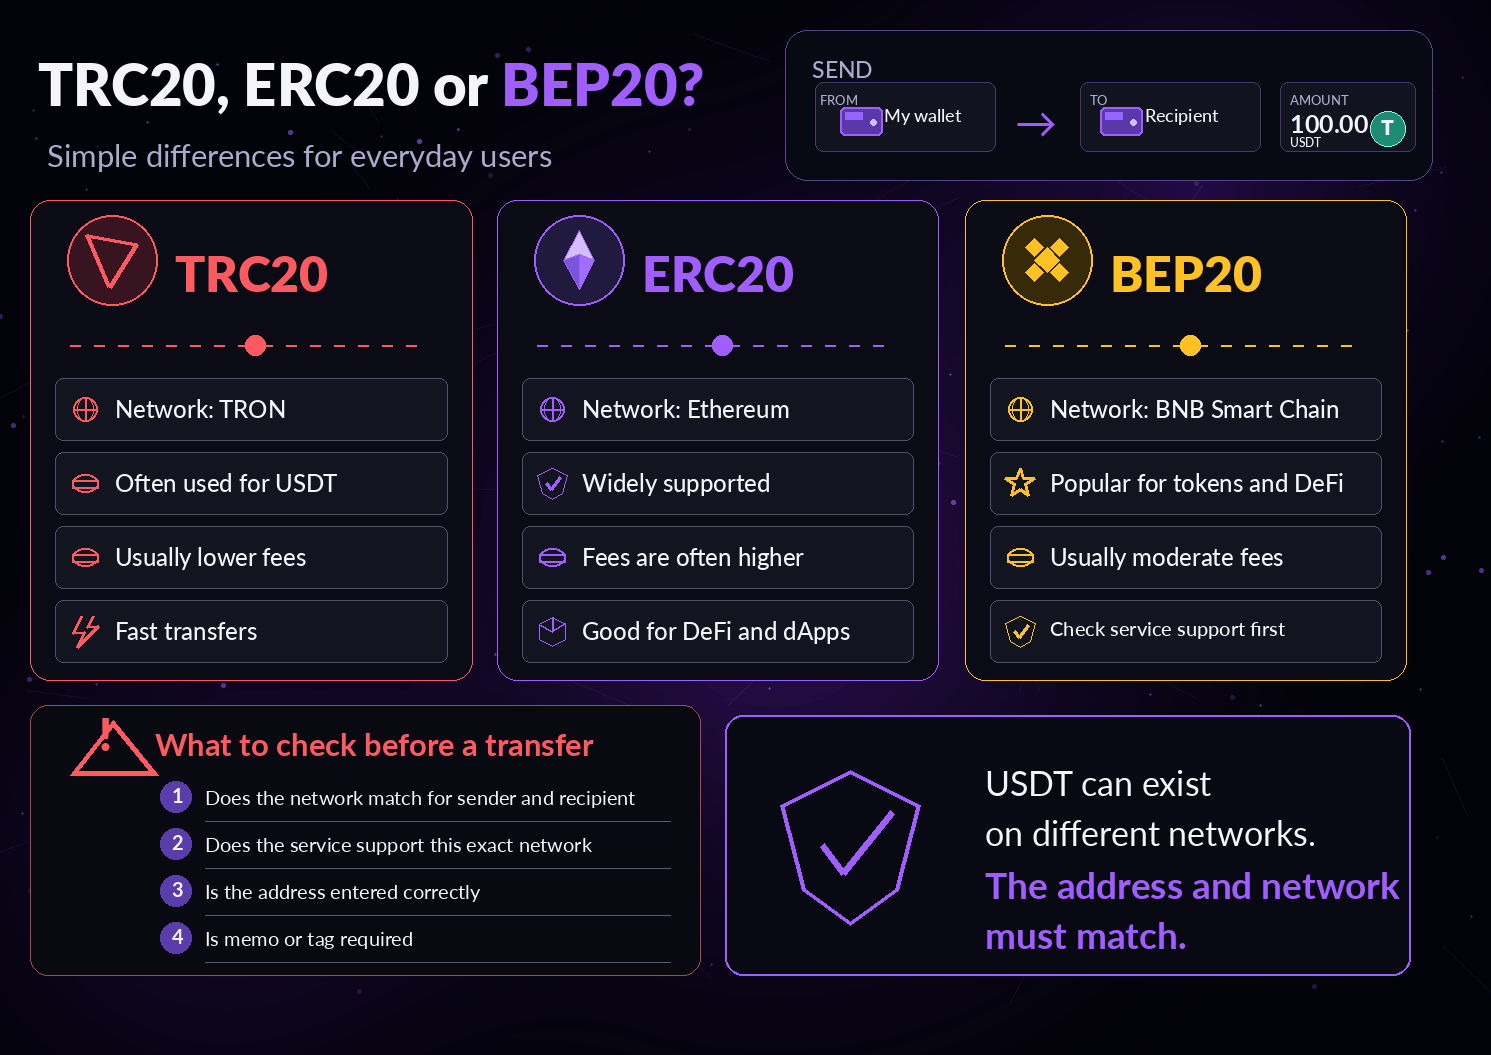
- TRC20 (TRON blockchain): the most popular option for USDT. Fees are low and fixed, and transactions usually go through within 1–3 minutes. It works well for fast payments.
- ERC20 (Ethereum blockchain): the classic and most reliable standard, but fees here are dynamic. When the network is busy, a transfer can cost from $10 to $30 or more, and the waiting time starts from 3–5 minutes.
- BEP20 (BNB Smart Chain blockchain): a network from the Binance ecosystem. It offers very cheap transactions and 1–2 minute transfer speed, but not every external platform or wallet is ready to accept this type of USDT.
The main rule: the sender address and the recipient address must be in the same network. If the order or exchange page says USDT TRC20, you can only send it through the TRON network.
Checklist: 6 steps before sending crypto
To avoid having to search for a payment manually, make it a habit to check these points 10 seconds before sending:
- Check the network, not only the coin. The asset name (USDT) is the same, but the transfer routes are completely different.
- Do not type the address manually. Use only copying or a QR code. Always visually check the first 4 and last 4 characters after pasting.
- Look for Memo or Tag. Some networks require a digital tag in addition to the address. If you do not add it, the funds may go to the exchange’s general wallet instead of your personal balance.
- Check the minimum deposit amount. If a platform accepts deposits from $10 and you send $9.90, the payment may simply be cancelled by the blockchain.
- Consider the network fee. Make sure your wallet balance has enough funds to pay for gas (for example, TRX coins for TRC20 or ETH for ERC20), otherwise the transaction will not even start.
Why a transaction gets stuck and what to do
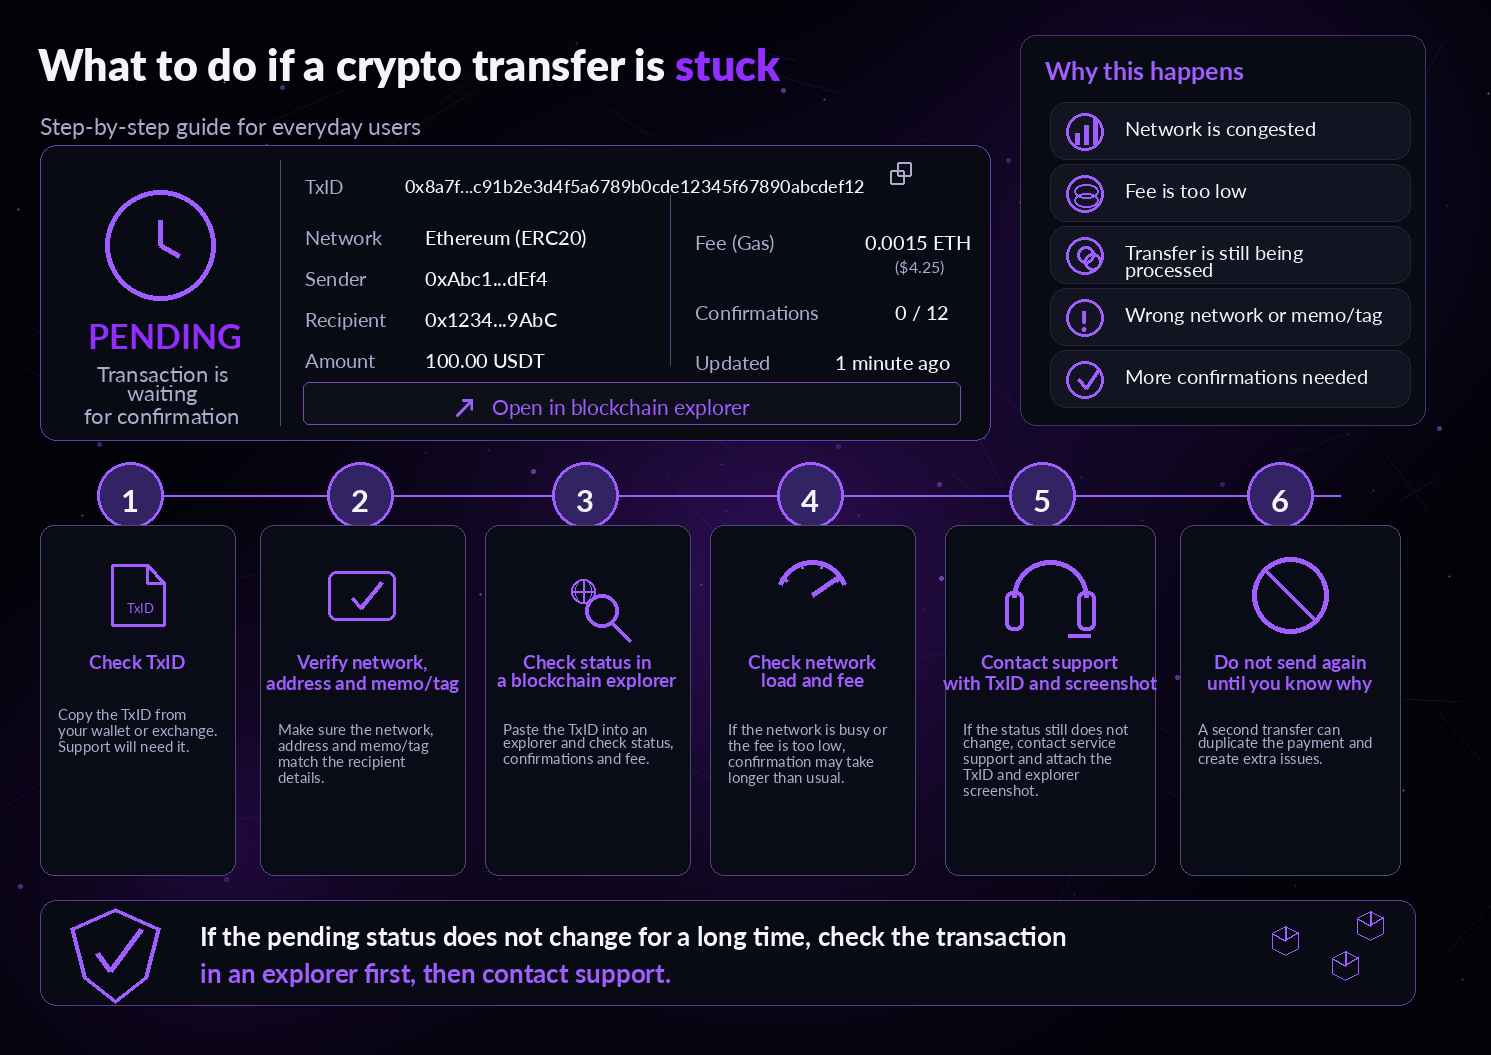
A stuck status (Pending) does not mean the money is gone. Usually, it is a technical delay caused by network congestion, when the blockchain cannot process the queue fast enough, or by a fee that was set too low by the sender. A delay can also happen because of internal security checks on the recipient service’s side.
Step-by-step action plan:
- Find the TxID. This is a unique hash, the passport of your transfer. It is always shown in the outgoing transaction history of your wallet or exchange.
- Check the status in Blockchain Explorer. Copy this TxID and paste it into the search bar of the relevant network scanner (for example, Tronscan for TRON, Etherscan for Ethereum or BscScan for BNB Chain).
-
Evaluate the result:
- Status Success: the money has been sent. If it does not appear in the recipient’s balance, the issue is on their side. You need to contact the support team of the receiving platform.
- Status Pending: the network queue is busy, so you need to wait.
- Status Fail: the funds were not debited or returned to the balance minus the fee for the failed sending attempt. Check limits or payment details and try again.
What should you do if you chose the wrong network?
If you sent USDT through BEP20 to a wallet that expected only TRC20, you cannot return it yourself. Blockchain does not have a cancel button.
The only chance is to contact the support team of the platform that was supposed to receive the funds immediately. Prepare the TxID, the amount, the network you chose by mistake and your order number. If the service controls the private keys for the address in both networks, its technical specialists may sometimes be able to recover the payment manually.
Never make another payment blindly hoping to cover the mistake. First, investigate the first transaction and wait for an answer from the official support team. Also remember: never share your passwords or Seed phrases with anyone — support teams never ask for them, only scammers do.
Conclusion
For safe and fast transfers, always use trusted monitoring tools and keep an eye on current network fees. If you are unsure about the address or amount, send a small test payment of $1 first. It can save both your nerves and your capital.